OpenSSH Password Authentication
Configure SSH Server to manage a server from the remote computer. SSH uses 22/TCP.
Step [1]Password Authentication for OpenSSH Server on Ubuntu is enabled by default, so it's possible to login without changing any settings. Furthermore, root account is prohibited Password Authentication by default with [PermitRootLogin prohibit-password], so default setting is good for use. But if you prohibit root login all, change like follows.
root@vms:~# apt -y install openssh-server
root@vms:~# vi /etc/ssh/sshd_config
# line 33 : uncomment and change to [no]
PermitRootLogin no
root@vms:~# systemctl restart ssh
SSH Client Ubuntu
Step [2]Configure SSH Client for Ubuntu. Install SSH Client.
root@client:~# apt -y install openssh-client
Step [3]Connect to the SSH server with a common user.
# ssh [username@hostname or IP address]
root@client:~# ssh ubuntu@vms.bizantum.lab
The authenticity of host 'vms.bizantum.lab (10.0.0.30)' can't be established.
ED25519 key fingerprint is SHA256:tcBXg2YcJJN2Z3JwMw8/ue9FIURcKJ63OqXFY2ZJmRw.
This key is not known by any other names
Are you sure you want to continue connecting (yes/no/[fingerprint])? yes
Warning: Permanently added 'vms.bizantum.lab' (ED25519) to the list of known hosts.
ubuntu@vms.bizantum.lab's password:
Welcome to Ubuntu 22.04 LTS (GNU/Linux 5.15.0-25-generic x86_64)
.....
.....
ubuntu@vms:~$     # just logined
Step [4]It's possible to execute commands on remote Host with adding commands to ssh command.
# for example, open [/etc/passwd] on remote host
ubuntu@client:~$ ssh ubuntu@vms.bizantum.lab "cat /etc/passwd"
ubuntu@vms.bizantum.lab's password:
root:x:0:0:root:/root:/bin/bash
daemon:x:1:1:daemon:/usr/sbin:/usr/sbin/nologin
bin:x:2:2:bin:/bin:/usr/sbin/nologin
sys:x:3:3:sys:/dev:/usr/sbin/nologin
sync:x:4:65534:sync:/bin:/bin/sync
.....
.....
SSH Client Windows
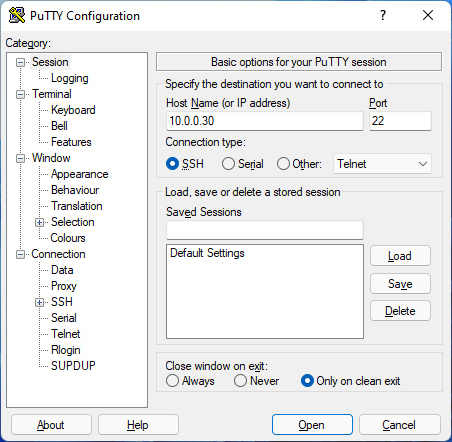
Step [5]Get a SSH Client for Windows. This example shows to use Putty like follows. Input your server's IP address and Click [Open] button.
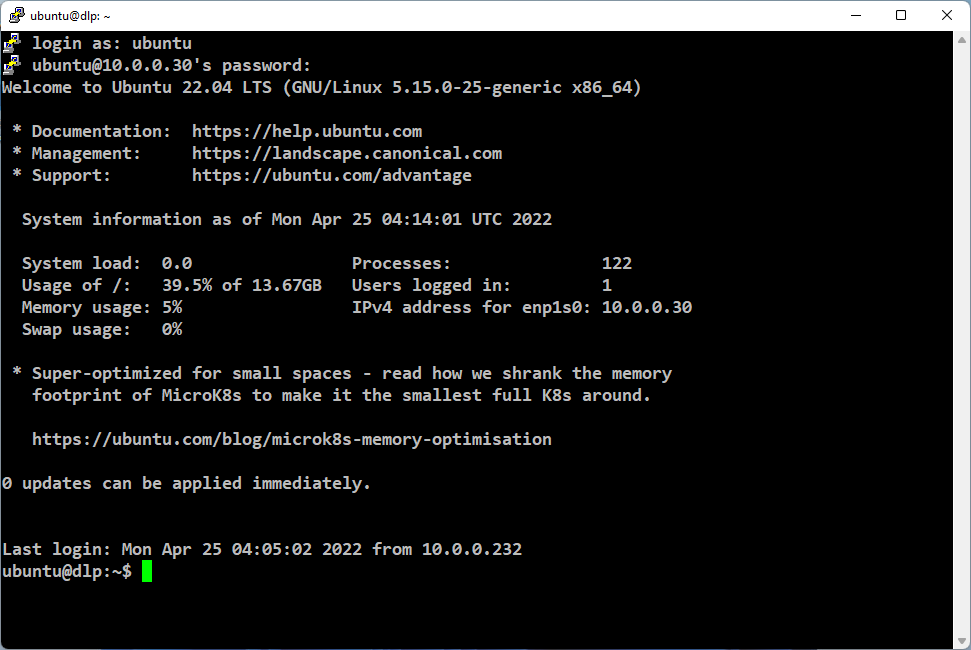
Step [6]After authentication on SSH server, it's possible to login remotely with SSH.
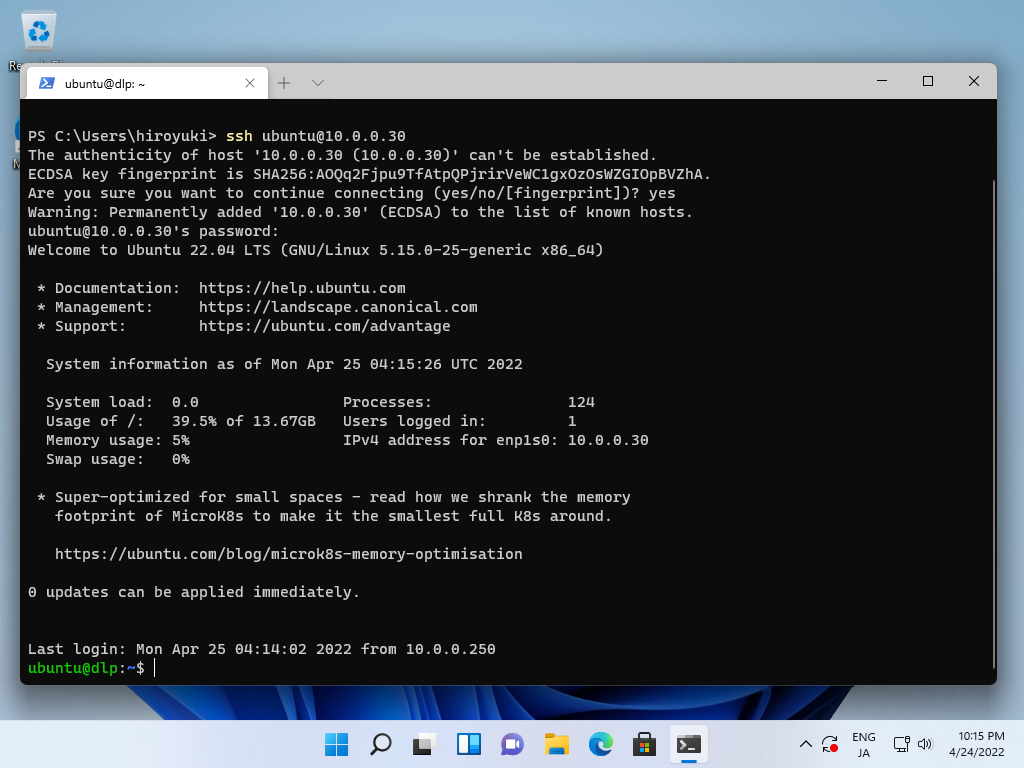
Step [7]OpenSSH Client has been implemented as an Windows feature, so it's possible to use ssh command on PowerShell or Command Prompt without Putty and other SSH software.
It's possible to transfer files with SSH.
Step [1]It's the example for using SCP (Secure Copy).
# usage ⇒ scp [Option] Source Target
# copy the [test.txt] on local to remote server [www.bizantum.lab]
ubuntu@vms:~$ scp ./test.txt ubuntu@www.bizantum.lab:~/
ubuntu@10.0.0.30's password:     # password of the user
test.txt                                                100%   10     0.0KB/s   00:00

# copy the [/home/ubuntu/test.txt] on remote server [www.bizantum.lab] to the local
ubuntu@vms:~$ scp ubuntu@www.bizantum.lab:/home/ubuntu/test.txt ./test.txt
ubuntu@10.0.0.30's password:
test.txt                                                100%   10     0.0KB/s   00:00
Step [2]It's example to use SFTP (SSH File Transfer Protocol). SFTP server feature is enabled by default, if not, enable it to add the line [Subsystem sftp /usr/lib/openssh/sftp-server] in [/etc/ssh/sshd_config].
# sftp [Option] [user@host]
ubuntu@vms:~$ sftp ubuntu@www.bizantum.lab
ubuntu@www.bizantum.lab's password:    # password of the user
Connected to www.bizantum.lab.
sftp>

# show current directory on remote server
sftp> pwd
Remote working directory: /home/ubuntu

# show current directory on local server
sftp> !pwd
/home/ubuntu

# show files in current directory on FTP server
sftp> ls -l
drwxrwxr-x    2 ubuntu     ubuntu            6 Apr 27 21:33 public_html
-rw-rw-r--    1 ubuntu     ubuntu           10 Apr 21 22:53 test.txt

# show files in current directory on local server
sftp> !ls -l
total 4
-rw-rw-r-- 1 ubuntu ubuntu 10 Apr 27 21:31 test.txt

# change directory
sftp> cd public_html
sftp> pwd
Remote working directory: /home/ubuntu/public_html

# upload a file to remote server
sftp> put test.txt ubuntu.txt
Uploading test.txt to /home/ubuntu/ubuntu.txt
test.txt                           100%   10     0.0KB/s   00:00
sftp> ls -l
drwxrwxr-x    2 ubuntu     ubuntu            6 Apr 27 21:33 public_html
-rw-rw-r--    1 ubuntu     ubuntu           10 Apr 27 21:39 ubuntu.txt
-rw-rw-r--    1 ubuntu     ubuntu           10 Apr 21 22:53 test.txt

# upload some files to remote server
sftp> put *.txt
Uploading test.txt to /home/ubuntu/test.txt
test.txt                                           100%   10     0.0KB/s   00:00
Uploading test2.txt to /home/ubuntu/test2.txt
test2.txt                                          100%    0     0.0KB/s   00:00
sftp> ls -l
drwxrwxr-x    2 ubuntu     ubuntu            6 Apr 27 21:33 public_html
-rw-rw-r--    1 ubuntu     ubuntu           10 Apr 27 21:39 ubuntu.txt
-rw-rw-r--    1 ubuntu     ubuntu           10 Apr 27 21:45 test.txt
-rw-rw-r--    1 ubuntu     ubuntu           10 Apr 27 21:46 test2.txt

# download a file from remote server
sftp> get test.txt
Fetching /home/ubuntu/test.txt to test.txt
/home/ubuntu/test.txt                   100%   10     0.0KB/s   00:00

# download some files from remote server
sftp> get *.txt
Fetching /home/ubuntu/ubuntu.txt to ubuntu.txt
/home/ubuntu/ubuntu.txt                                       100%   10     0.0KB/s   00:00
Fetching /home/ubuntu/test.txt to test.txt
/home/ubuntu/test.txt                                         100%   10     0.0KB/s   00:00
Fetching /home/ubuntu/test2.txt to test2.txt
/home/ubuntu/test2.txt                                        100%   10     0.0KB/s   00:00

# create a directory on remote server
sftp> mkdir testdir
sftp> ls -l
drwxrwxr-x    2 ubuntu     ubuntu            6 Apr 27 21:33 public_html
-rw-rw-r--    1 ubuntu     ubuntu           10 Apr 27 21:39 ubuntu.txt
-rw-rw-r--    1 ubuntu     ubuntu           10 Apr 27 21:45 test.txt
-rw-rw-r--    1 ubuntu     ubuntu           10 Apr 27 21:46 test2.txt
drwxrwxr-x    2 ubuntu     ubuntu            6 Apr 27 21:53 testdir

# delete a directory on remote server
sftp> rmdir testdir
rmdir ok, `testdir' removed
sftp> ls -l
drwxrwxr-x    2 ubuntu     ubuntu            6 Apr 27 21:33 public_html
-rw-rw-r--    1 ubuntu     ubuntu           10 Apr 27 21:39 ubuntu.txt
-rw-rw-r--    1 ubuntu     ubuntu           10 Apr 27 21:45 test.txt
-rw-rw-r--    1 ubuntu     ubuntu           10 Apr 27 21:46 test2.txt

# delete a file on remote server
sftp> rm test2.txt
Removing /home/ubuntu/test2.txt
sftp> ls -l
drwxrwxr-x    2 ubuntu     ubuntu            6 Apr 27 21:33 public_html
-rw-rw-r--    1 ubuntu     ubuntu           10 Apr 27 21:39 ubuntu.txt
-rw-rw-r--    1 ubuntu     ubuntu           10 Apr 27 21:45 test.txt

# execute commands with ![command]
sftp> !cat /etc/passwd
root:x:0:0:root:/root:/bin/bash
bin:x:1:1:bin:/bin:/sbin/nologin
.....
.....
ubuntu:x:1001:1001::/home/ubuntu:/bin/bash

# exit
sftp> quit
221 Goodbye.
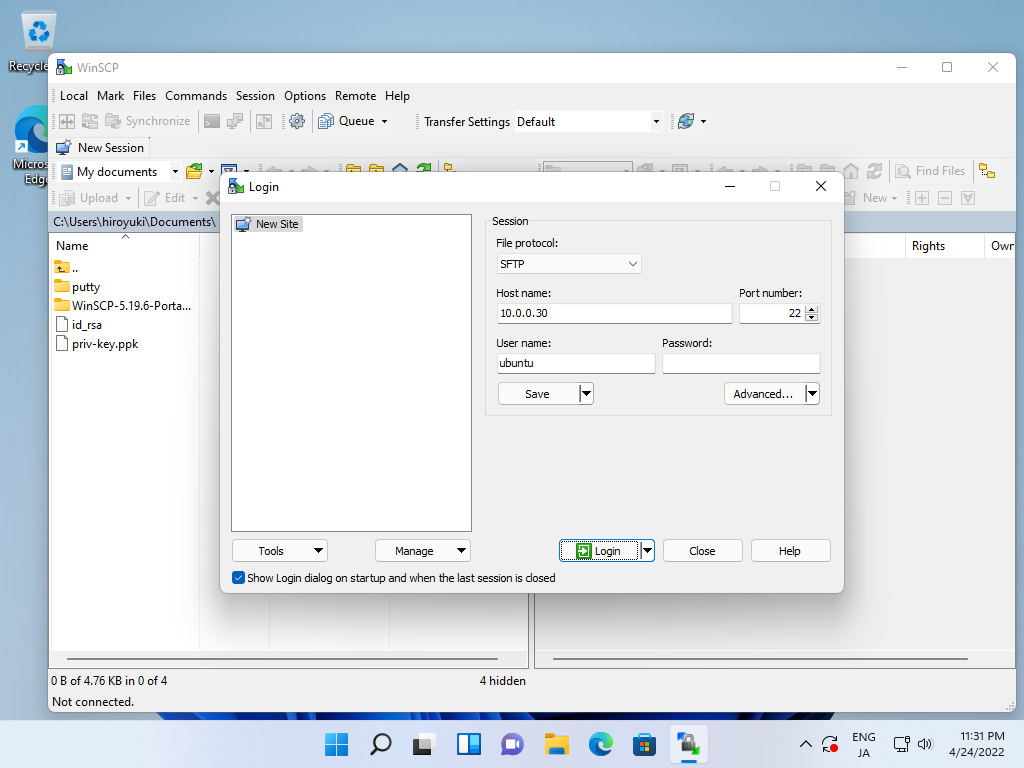
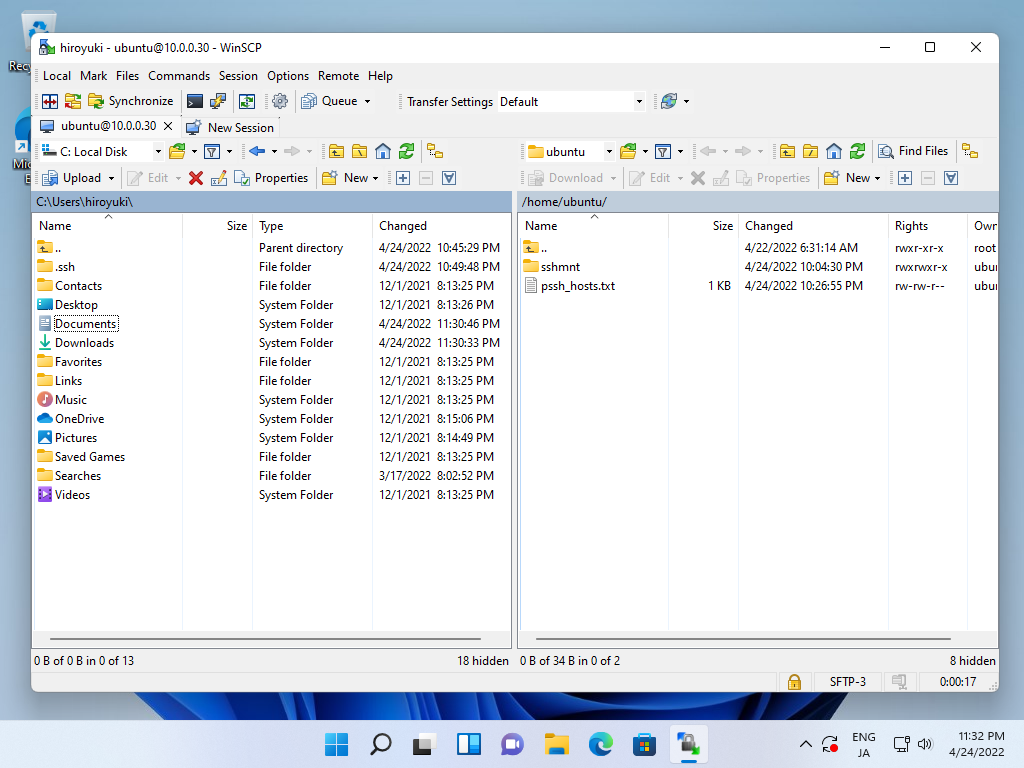
It's possible to transfer files via SSH on Windows Client. On this example, it shows WinSCP (winscp.net/eng/download.php) for it. If you are using Windows, OpenSSH Client has been implemented as an Windows feature like here [7], so it's possible to use [scp], [sftp] commands like the examples here.
Step [1]Install and start WinSCP, then following initial windows is displayed. Input Hostname, Username and User's Password and then Click [Login] button.
Step [2]After successing authentication, it's possible to transfer files on WinSCP via SSH.
SSH Key-Pair Authentication on Linux Client
Configure SSH server to login with Key-Pair Authentication. Create a private key for client and a public key for server to do it.
Step [1]Create Key-Pair by each user, so login with a common user on SSH Server Host and work like follows.
# create key-pair
ubuntu@vms:~$ ssh-keygen
Generating public/private rsa key pair.
Enter file in which to save the key (/home/ubuntu/.ssh/id_rsa):   # Enter or input changes if you want
Enter passphrase (empty for no passphrase):   # set passphrase (if set no passphrase, Enter with empty)
Enter same passphrase again:
Your identification has been saved in /home/ubuntu/.ssh/id_rsa
Your public key has been saved in /home/ubuntu/.ssh/id_rsa.pub
The key fingerprint is:
SHA256:Sy81HjIIQhqVHeVoxBxfV/JEflv16yS7wl3TXBafBaw ubuntu@vms.bizantum.lab
The key's randomart image is:
.....
.....

ubuntu@vms:~$ ll ~/.ssh
total 16
drwx------ 2 ubuntu ubuntu 4096 Apr 25 04:37 ./
drwxr-x--- 4 ubuntu ubuntu 4096 Apr 22 13:33 ../
-rw------- 1 ubuntu ubuntu    0 Apr 22 13:31 authorized_keys
-rw------- 1 ubuntu ubuntu 2655 Apr 25 04:37 id_rsa
-rw-r--r-- 1 ubuntu ubuntu  574 Apr 25 04:37 id_rsa.pub

ubuntu@vms:~$ cat ~/.ssh/id_rsa.pub >> ~/.ssh/authorized_keys
Step [2]Transfer the private key created on the Server to a Client, then it's possible to login with Key-Pair authentication.
ubuntu@node01:~$ mkdir ~/.ssh
ubuntu@node01:~$ chmod 700 ~/.ssh
# transfer the private key to the local ssh directory
ubuntu@node01:~$ scp ubuntu@10.0.0.30:/home/ubuntu/.ssh/id_rsa ~/.ssh/
ubuntu@10.0.0.30's password:
id_rsa                                        100% 2655     1.8MB/s   00:00

ubuntu@node01:~$ ssh ubuntu@10.0.0.30
Enter passphrase for key '/home/ubuntu/.ssh/id_rsa':   # passphrase if you set
Welcome to Ubuntu 22.04 LTS (GNU/Linux 5.15.0-25-generic x86_64)

ubuntu@vms:~$     # logined
Step [3]If you set [PasswordAuthentication no], it's more secure.
root@vms:~# vi /etc/ssh/sshd_config
# line 57 : change to [no]
PasswordAuthentication no
root@vms:~# systemctl restart ssh
SSH Key-Pair Authentication on Windows Client
This is the example to login to SSH server from Windows Client. On this example, it shows with Putty. Before it, Transfer a private key to Windows client computer.
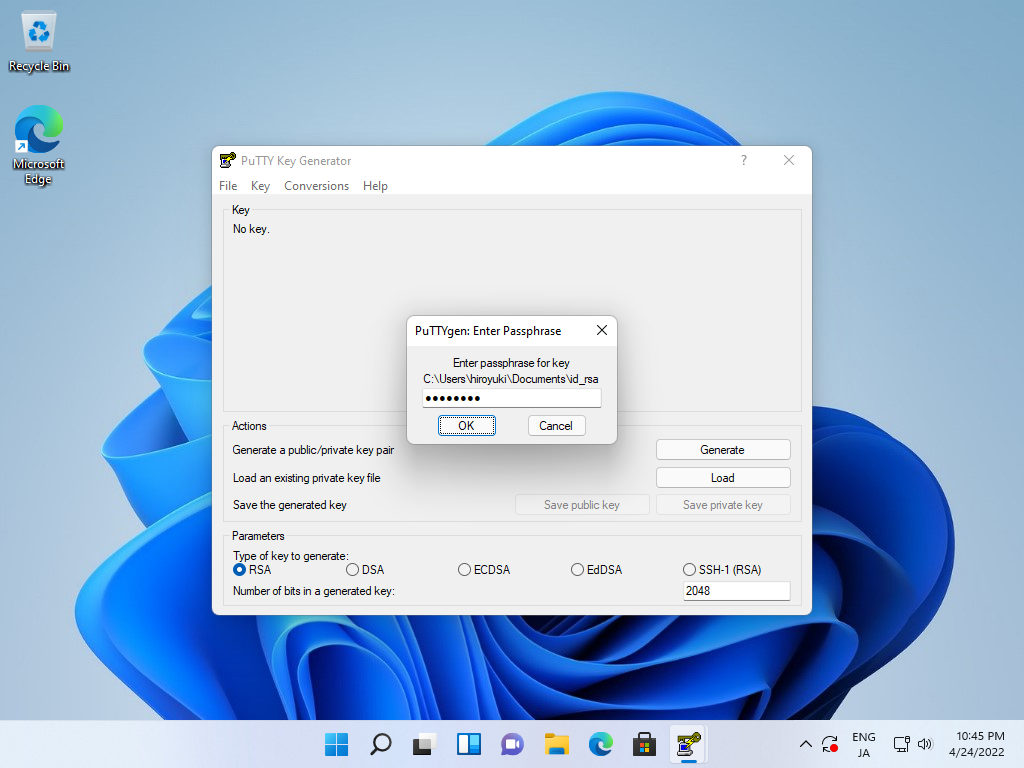
Step [4]Run [Puttygen.exe] that is included in [Putty]. (placed in the folder [Putty.exe] is also placed) If not included, Download it from official site (www.chiark.greenend.org.uk/~sgtatham/putty/). After starting [Puttygen.exe], Click [Load] button on the following window.

Step [5]Specify the private key that you transferred from SSH server, then passphrase is required like follows, answer it. (if not set passphrase, this step is skipped)
Step [6]Click [Save private key] button to save it under a folder you like with any file name you like.

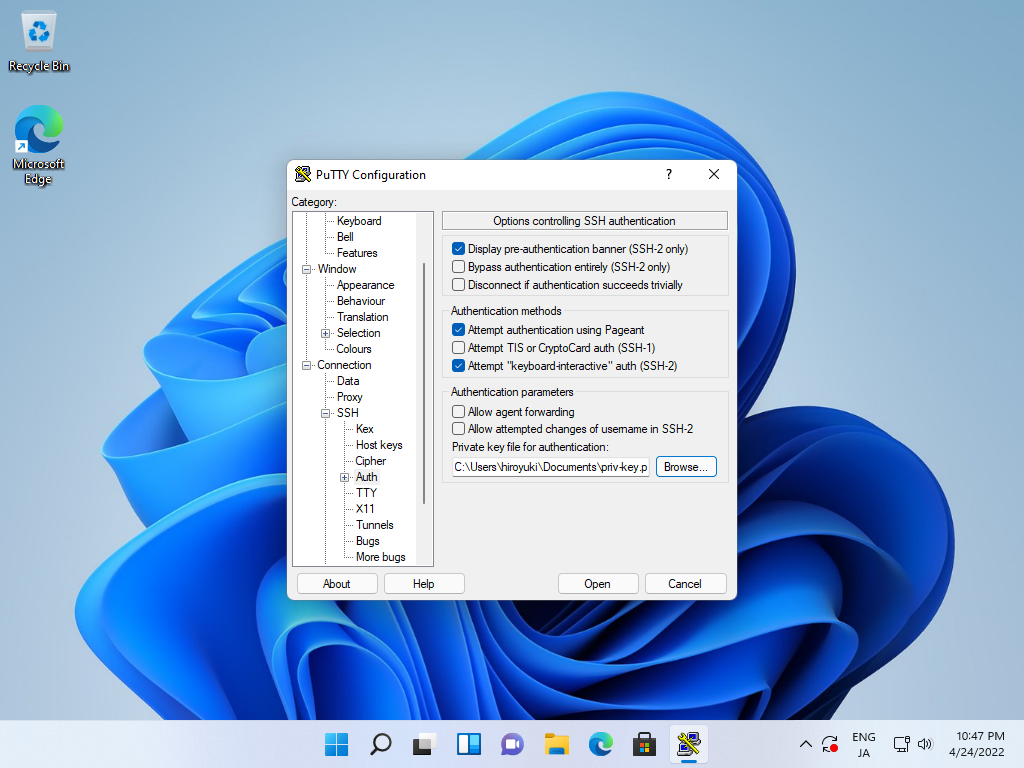
Step [7]Start Putty and Open [Connection] - [SSH] - [Auth] on the left pane, then specify your private key on the [Private key file] field.
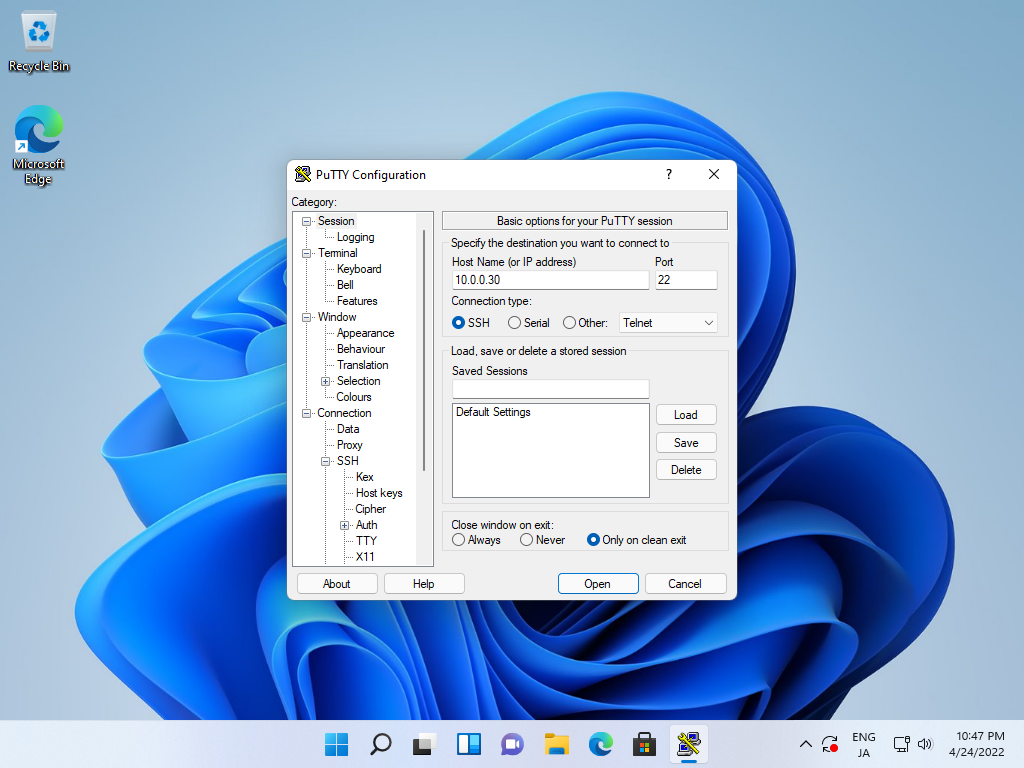
Step [8]Back to the [Session] on the left pane and specify your SSH server host to Connect.
Step [9]When SSH key-pair is set, the passphrase if it is set is required to login like follows, then answer it.
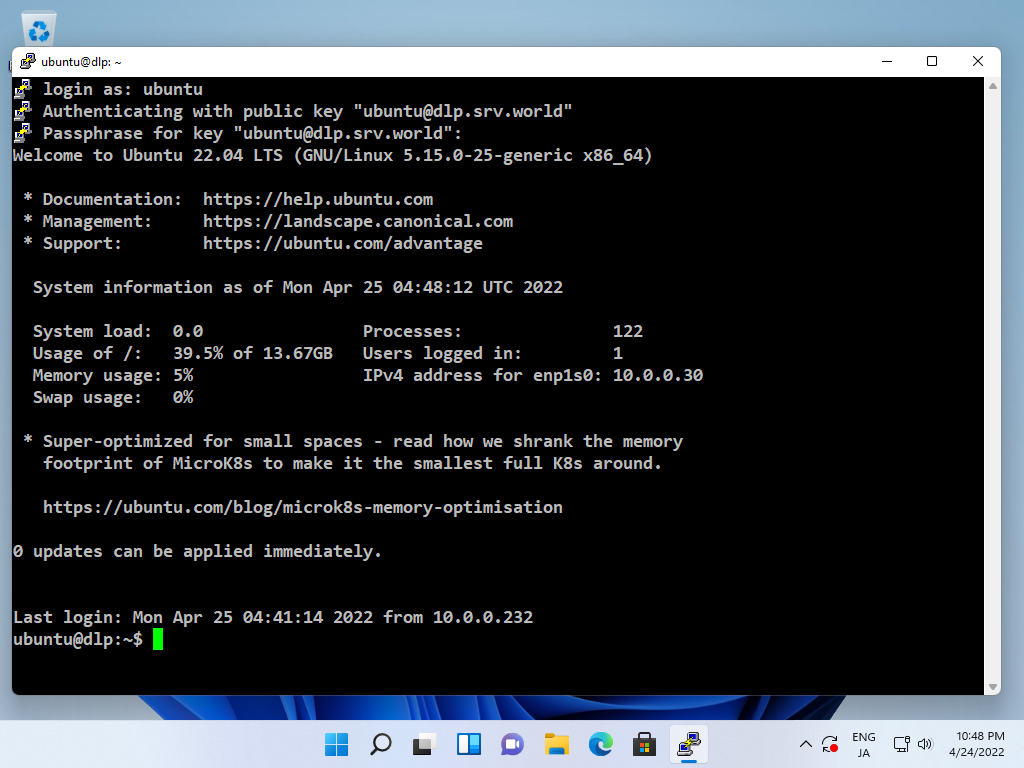
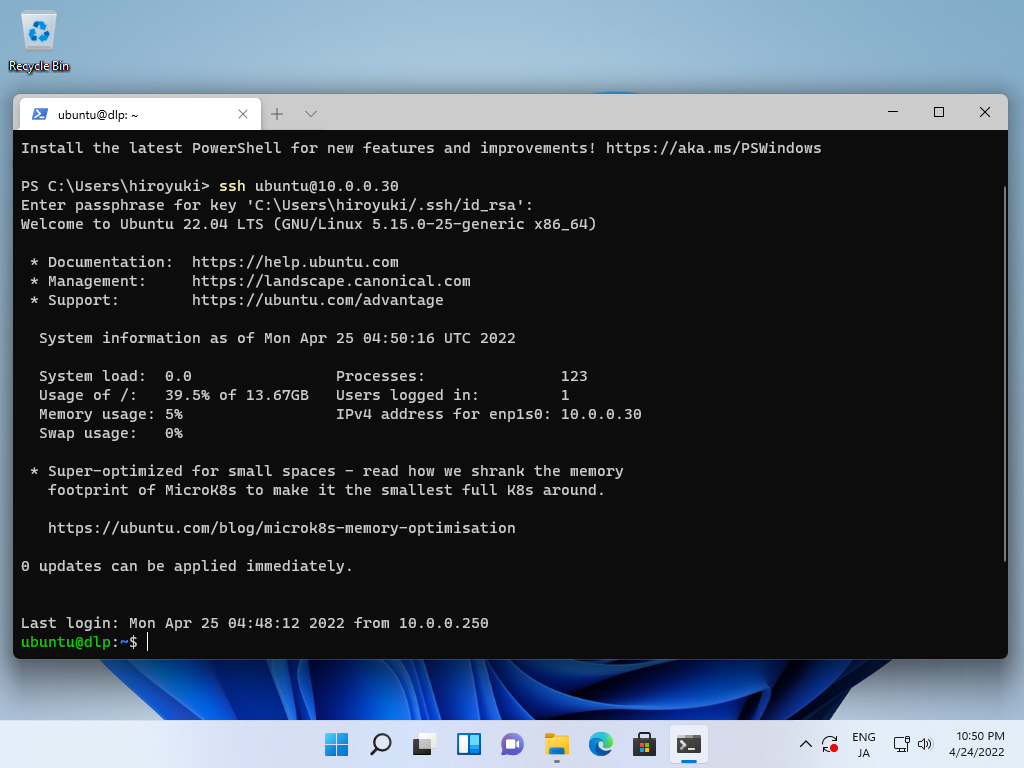
Step [10]OpenSSH Client has been implemented as an Windows feature, so it's possible to authenticate with SSH Key-Pair without Putty and other 3rd party softwares. Transfer your private key to your Windows and put it under the [(logon user home).ssh] folder like follows, then it's ready to use Key-Pair authentication.
Configure SFTP only + Chroot. Some users who are applied this setting can access only with SFTP and also applied chroot directory.
Step [1]For example, Set [/home] as the Chroot directory.
# create a group for SFTP only
root@vms:~# groupadd sftp_users
# apply to a user [ubuntu] for SFTP only as an example
root@vms:~# usermod -aG sftp_users ubuntu
root@vms:~# vi /etc/ssh/sshd_config
# line 115 : comment out and add a line like below
#Subsystem sftp /usr/lib/openssh/sftp-server
Subsystem sftp internal-sftp
# add to the end
Match Group sftp_users
    X11Forwarding no
    AllowTcpForwarding no
    ChrootDirectory /home
    ForceCommand internal-sftp

root@vms:~# systemctl restart ssh
Step [2]Try to access with a user and verify the settings.
ubuntu@node01:~$ ssh ubuntu@vms.bizantum.lab
Enter passphrase for key '/home/ubuntu/.ssh/id_rsa':
This service allows sftp connections only.
Connection to vms.bizantum.lab closed.   # denied as settings

ubuntu@node01:~$ sftp ubuntu@vms.bizantum.lab
Enter passphrase for key '/home/ubuntu/.ssh/id_rsa':
Connected to vms.bizantum.lab.
sftp>
Use SSH-Agent to automate inputting passphrase on key-pair authentication. Using SSH-Agent is valid for users who set SSH Key Pair with Passphrase.
Step [1]It's necessarry to set key-pair with Passphrase first.
Step [2]This is how to use SSH-Agent.
# start SSH-Agent
ubuntu@node01:~$ eval $(ssh-agent)
Agent pid 1040
# add Identity
ubuntu@node01:~$ ssh-add
Enter passphrase for /home/ubuntu/.ssh/id_rsa:
Identity added: /home/ubuntu/.ssh/id_rsa (ubuntu@vms.bizantum.lab)
# confirm
ubuntu@node01:~$ ssh-add -l
3072 SHA256:Sy81HjIIQhqVHeVoxBxfV/JEflv16yS7wl3TXBafBaw ubuntu@vms.bizantum.lab (RSA)
# try to connect with SSH without passphrase
ubuntu@node01:~$ ssh vms.bizantum.lab hostname
vms.bizantum.lab
# exit from SSH-Agent
ubuntu@node01:~$ eval $(ssh-agent -k)
Agent pid 1040 killed
Use SSHPass to automate inputting password on password authentication. This is convenient but it has security risks (leak of password), take special care if you use it.
Step [1]Install SSHPass.
root@vms:~# apt -y install sshpass
Step [2]How to use SSHPass.
# [-p password] : from argument
# if initial connection, add [StrictHostKeyChecking=no]
ubuntu@vms:~$ sshpass -p password ssh -o StrictHostKeyChecking=no 10.0.0.51 hostname
node01.bizantum.lab
# [-f file] : from file
ubuntu@vms:~$ echo 'password' > sshpass.txt
ubuntu@vms:~$ chmod 600 sshpass.txt
ubuntu@vms:~$ sshpass -f sshpass.txt ssh 10.0.0.51 hostname
node01.bizantum.lab
# [-e] : from environment variable
ubuntu@vms:~$ export SSHPASS=password
ubuntu@vms:~$ sshpass -e ssh 10.0.0.51 hostname
node01.bizantum.lab
It's possible to mount filesystem on another Host via SSH to use SSHFS.
Step [1]Install fuse-sshfs.
root@vms:~# apt -y install sshfs
Step [2]It's possible to use by any user. For example, [ubuntu] user mount [/home/ubuntu/work] on [node01.bizantum.lab] to local [~/sshmnt].
ubuntu@vms:~$ mkdir ~/sshmnt
# mount with SSHFS
ubuntu@vms:~$ sshfs node01.bizantum.lab:/home/ubuntu/work ~/sshmnt
ubuntu@node01.bizantum.lab's password:   # password of the user
ubuntu@vms:~$ df -hT
Filesystem                         Type        Size  Used Avail Use% Mounted on
tmpfs                              tmpfs       393M 1008K  392M   1% /run
/dev/mapper/ubuntu--vg-ubuntu--lv  ext4         14G  5.4G  7.6G  42% /
tmpfs                              tmpfs       2.0G     0  2.0G   0% /dev/shm
tmpfs                              tmpfs       5.0M     0  5.0M   0% /run/lock
/dev/vda2                          ext4        2.0G  125M  1.7G   7% /boot
tmpfs                              tmpfs       393M  4.0K  393M   1% /run/user/0
node01.bizantum.lab:/home/ubuntu/work fuse.sshfs   14G  5.4G  7.6G  42% /home/ubuntu/sshmnt
# just mounted

# for unmount, do like follows
ubuntu@vms:~$ fusermount -u ~/sshmnt
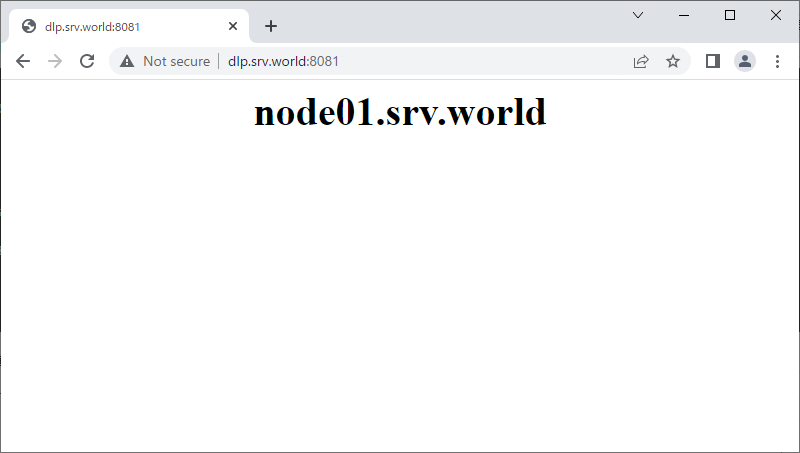
It's possible to forward a port to another port with SSH port forwarding.
Step [1]For example, set SSH Port Forwarding that requests to port [8081] on [vms.bizantum.lab (10.0.0.30)] are forwarded to port [80] on [node01.bizantum.lab (10.0.0.51)].
# SSH login from source host to target host
ubuntu@vms:~$ ssh -L 10.0.0.30:8081:10.0.0.51:80 ubuntu@node01.bizantum.lab
ubuntu@node01.bizantum.lab's password:   # password of the user
ubuntu@node01:~$
# confirm
ubuntu@node01:~$ ssh vms.bizantum.lab "ss -napt | grep 8081"
ubuntu@vms.bizantum.lab's password:
LISTEN 0      128        10.0.0.30:8081       0.0.0.0:*     users:(("ssh",pid=1055,fd=4))

# listen on 8081
# keep this login session
Step [2]Verify to access to a port on source Host you set from any client Host, then target port on target Host replies.
Install Parallel SSH to connect to multiple hosts.
Step [1]Install PSSH.
root@vms:~# apt -y install pssh
Step [2]This is the basic usage for PSSH. This is the case for key-pair authentication without passphrase. If passphrase is set in key-pair, start SSH-Agent first to automate inputting passphrase.
# connect to hosts and execute [hostname] command
ubuntu@vms:~$ parallel-ssh -H "10.0.0.51 10.0.0.52" -i "hostname"
[1] 17:28:02 [SUCCESS] 10.0.0.51
node01.bizantum.lab
[2] 17:28:02 [SUCCESS] 10.0.0.52
node02.bizantum.lab
# it's possible to read host list from a file
ubuntu@vms:~$ vi pssh_hosts.txt
# write hosts per line like follows
ubuntu@10.0.0.51
ubuntu@10.0.0.52
ubuntu@vms:~$ parallel-ssh -h pssh_hosts.txt -i "uptime"
[1] 19:37:59 [SUCCESS] ubuntu@10.0.0.52
 19:37:59 up  1:35,  0 users,  load average: 0.00, 0.00, 0.00
[2] 19:37:59 [SUCCESS] ubuntu@10.0.0.51
 19:37:59 up  1:35,  0 users,  load average: 0.00, 0.00, 0.00
Step [3]It's possible to connect with password authentication too, but it needs passwords on all hosts are the same one.
ubuntu@vms:~$ parallel-ssh -h pssh_hosts.txt -A -O PreferredAuthentications=password -i "uname -r"
Warning: do not enter your password if anyone else has superuser
privileges or access to your account.
Password:     # input password
[1] 05:27:08 [SUCCESS] ubuntu@10.0.0.51
5.15.0-25-generic
[2] 05:27:08 [SUCCESS] ubuntu@10.0.0.52
5.15.0-25-generic
Step [4]By the way, PSSH package includes [parallel-scp], [parallel-rsync], [parallel-slurp], [parallel-nuke] commands and you can use.


Comments
Post a Comment
Thank you for your comment! We appreciate your feedback, feel free to check out more of our articles.
Best regards, Bizantum Blog Team.