
Debian 12 "Bookworm" is the latest stable release of the Debian operating system, providing enhanced stability, security, and a vast repository of software. Installing Debian 12 on your system is straightforward and involves a few key steps. This guide will help you get started with the installation process.
Pre-Installation
Step [1]Download Debian GNU/Linux 12 bookworm ( released on 10 June, 2023 ) from the following site.
Create Bootable Installation
After downloading ISO of Debian, Burn it to a DVD with an burning application to create an installation disk. If you create it with the feature of Windows 10/11, refer to follows.
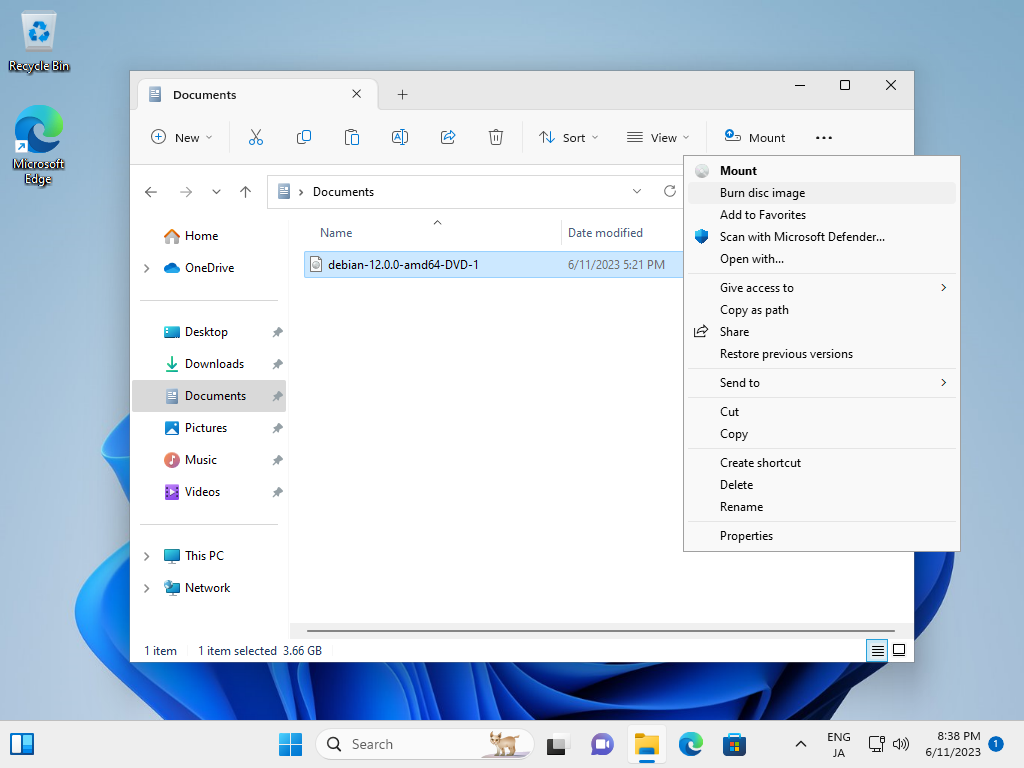
Step [2]Insert an empty DVD media in DVD drive. Next, right-click the ISO image of Debian and select [Burn Disk image] in the menu.
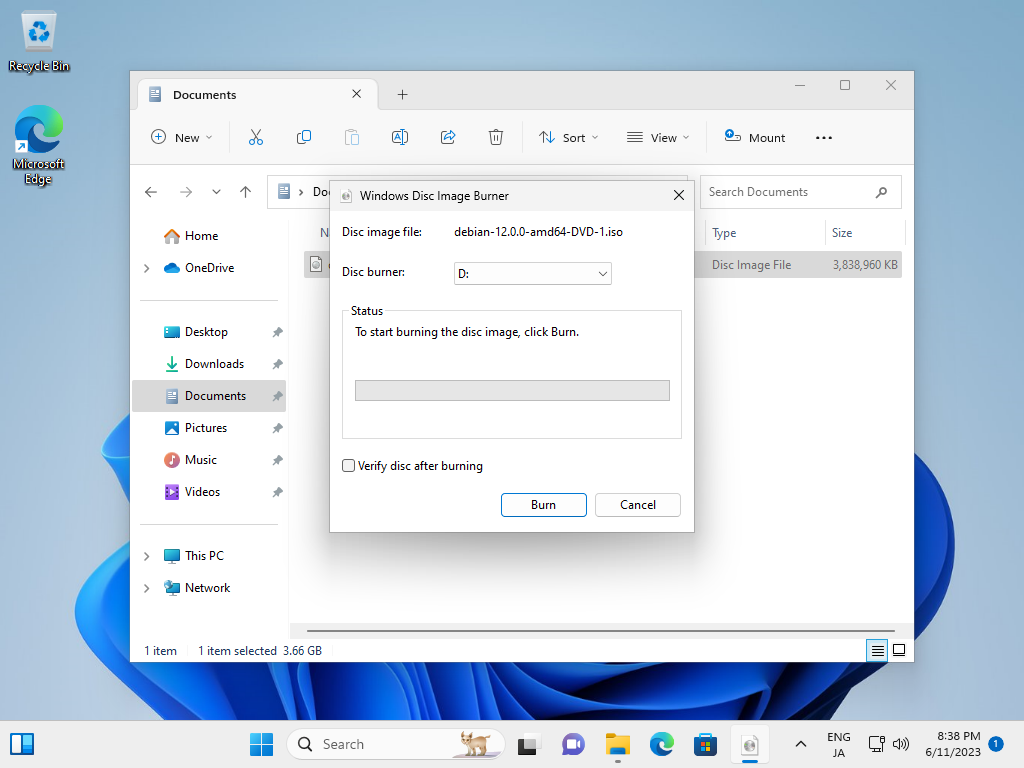
Step [3]Click the [Burn] button and start burning.After finishing it, eject the disk and proceed to the installation step.
Installation
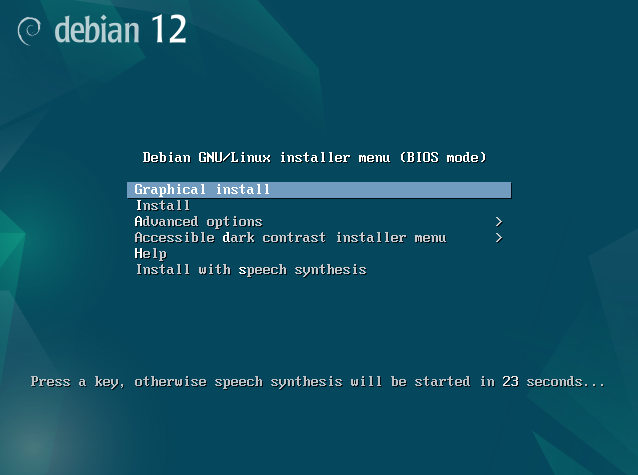
Step [1]Insert a disk for installation of Debian bookworm and reboot your computer. On the following screen, Enter with [Graphical install].
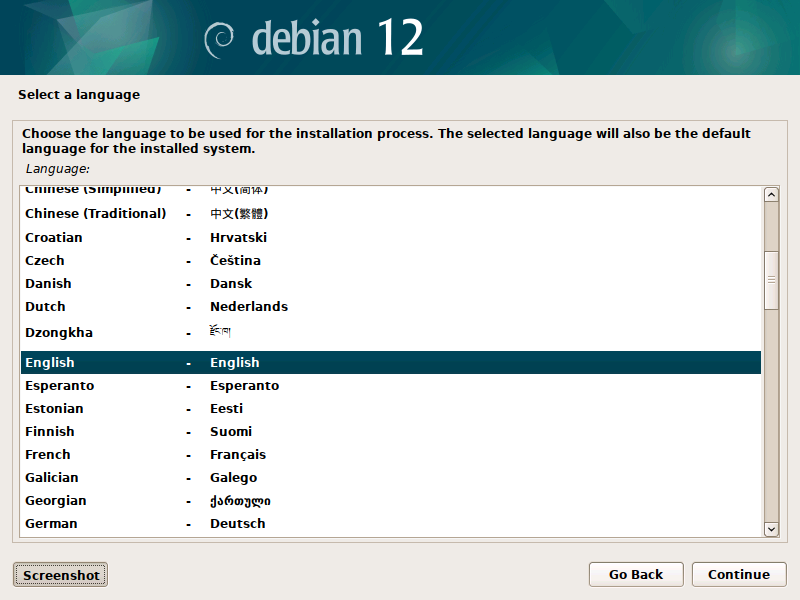
Step [2]Select the language which is used during the Installation.
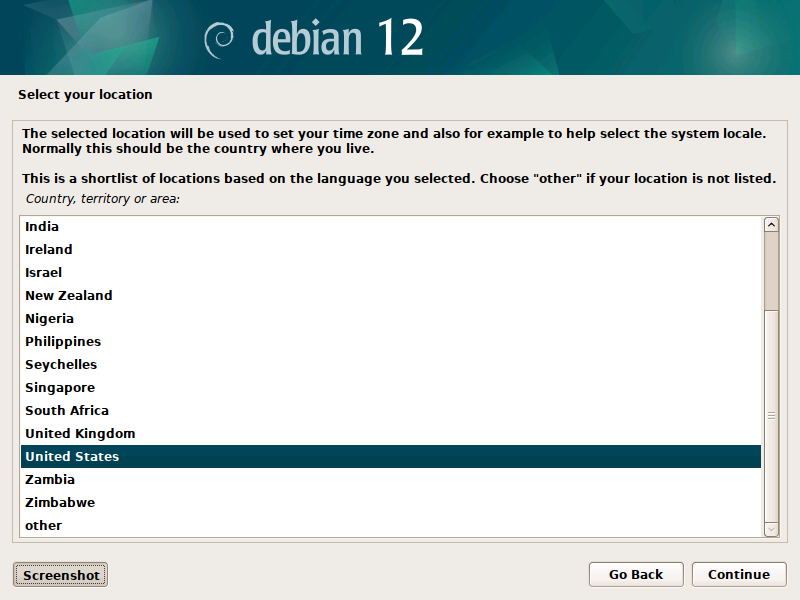
Step [3]Select your country for System TimeZone setting.
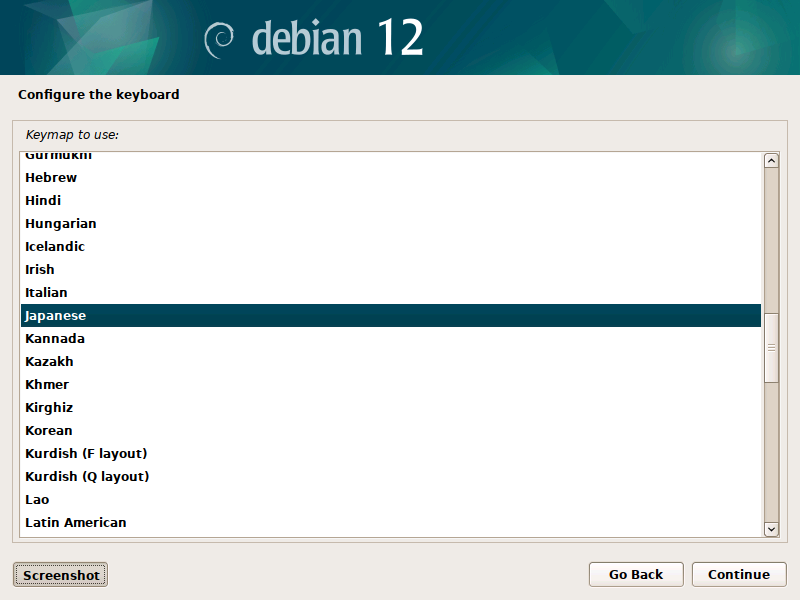
Step [4]Select the keyboard layout you are using now.
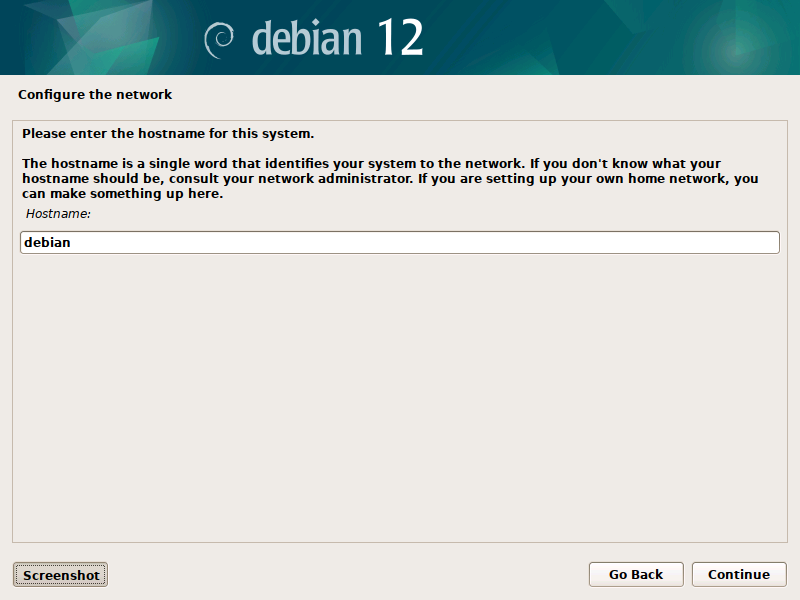
Step [5]Set your server's hostname you'd like to set.
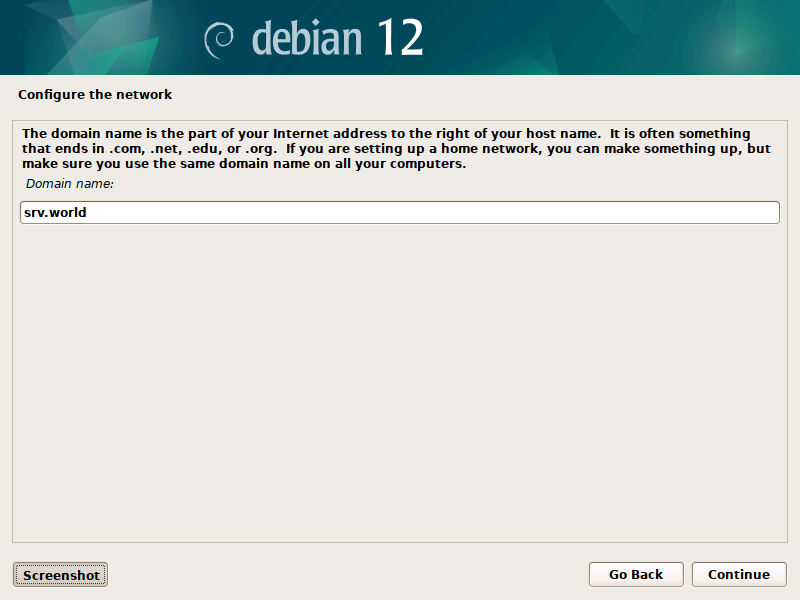
Step [6]Input your Network Domain name.
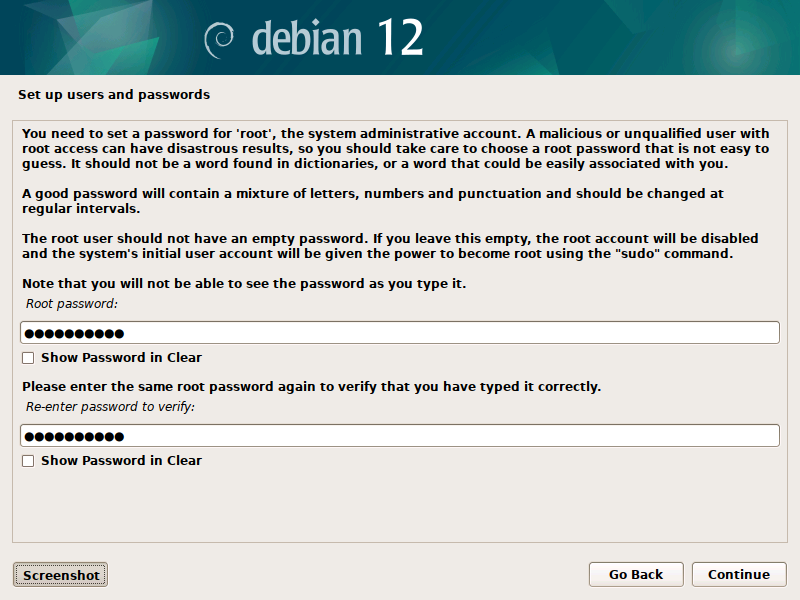
Step [7]Set root account's password.
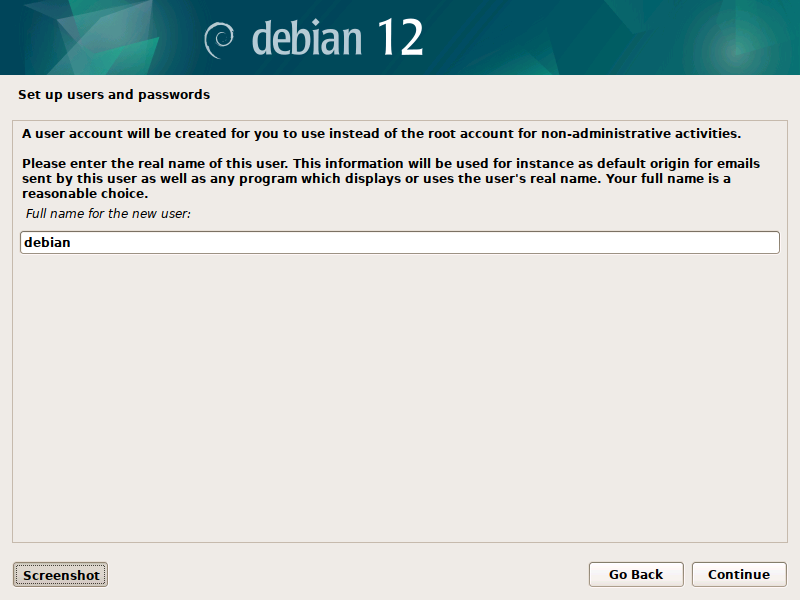
Step [8]Set a common user account. (full-name for display).
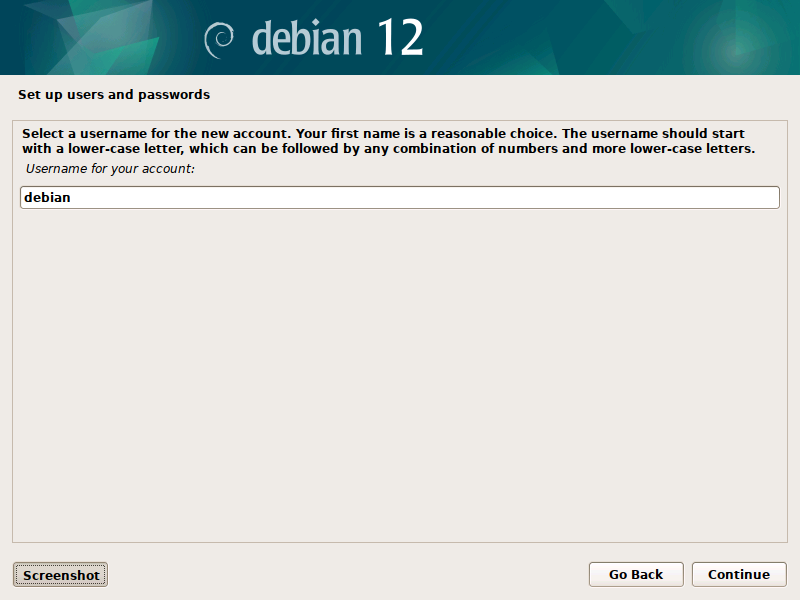
Step [9]Input a user name used on the system.
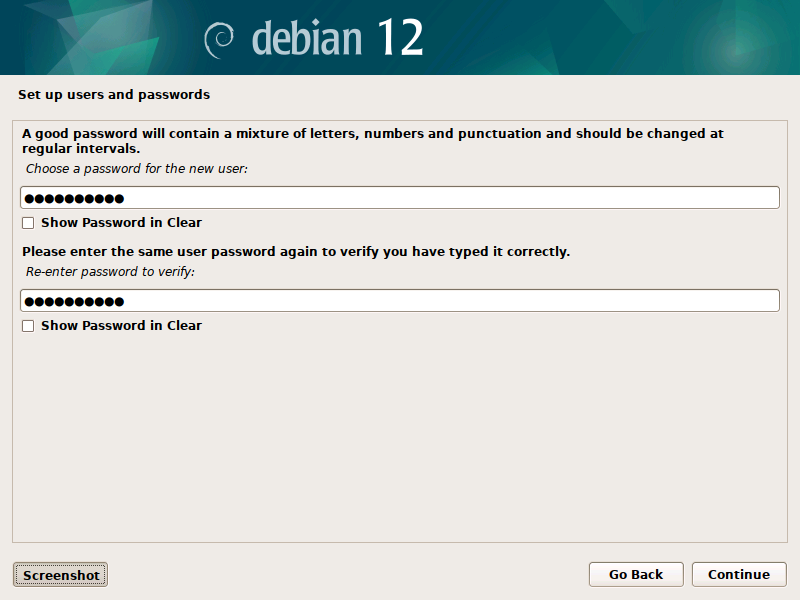
Step [10]Set password for a user added in pre-section.
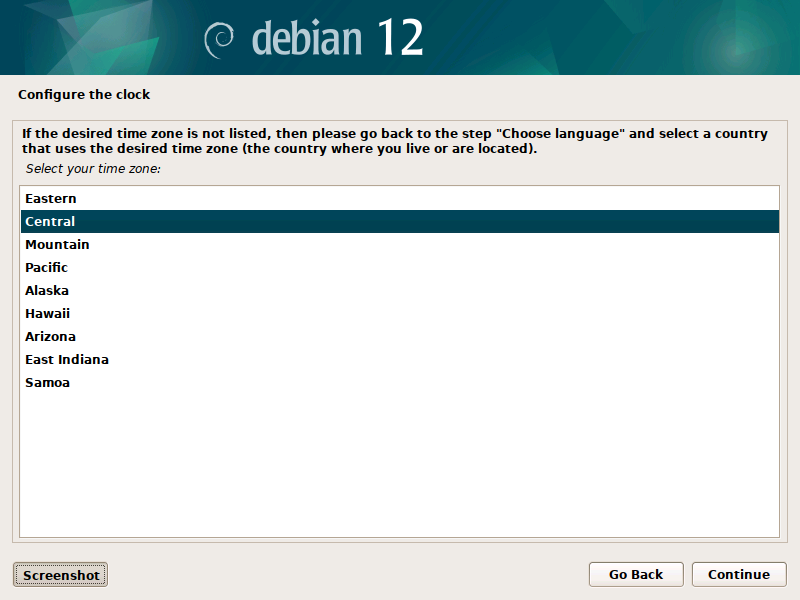
Step [11]Select your TimeZone area.
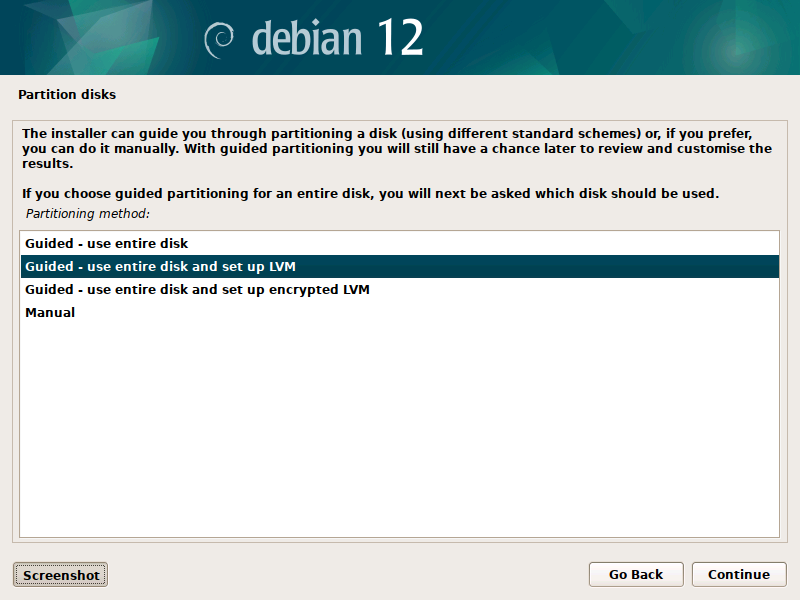
Step [12]This is the section for configuring partition. On this example, it selects [Guided with LVM] like follows.
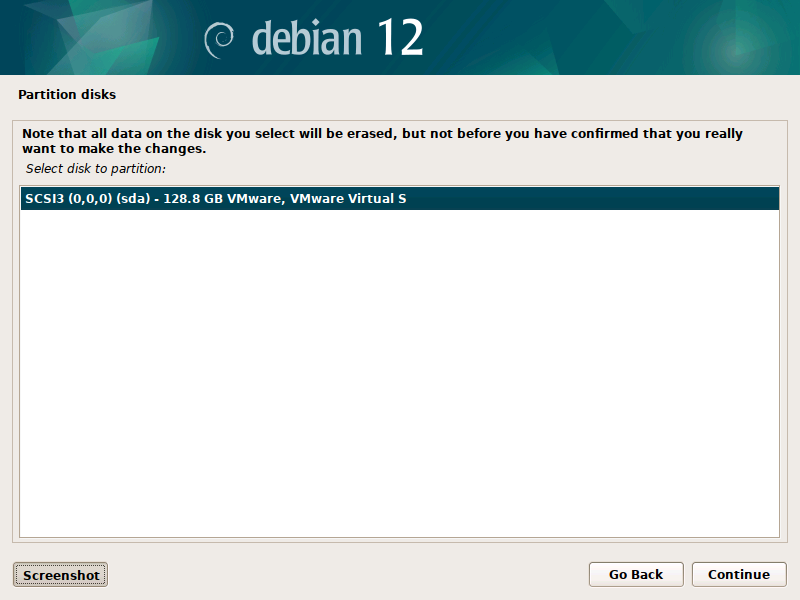
Step [13]Select a disk to create partitions for Debian System.
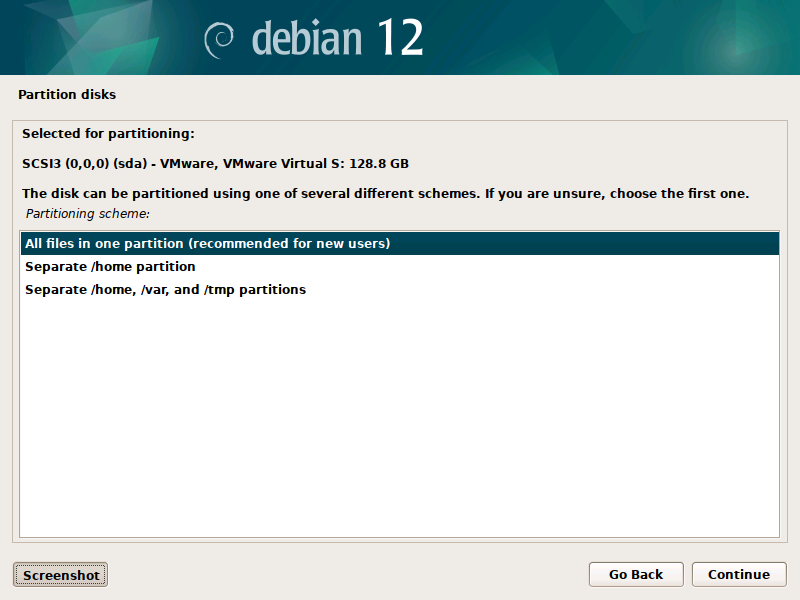
Step [14]Select a type of partition layout you'd like to set.
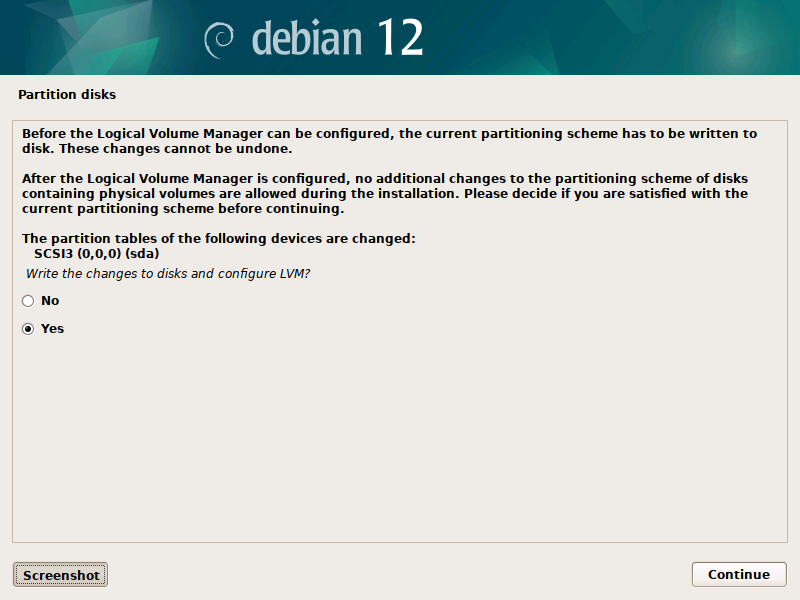
Step [15]It's the confirmation for configuring partition. If that's OK, answer [Yes].
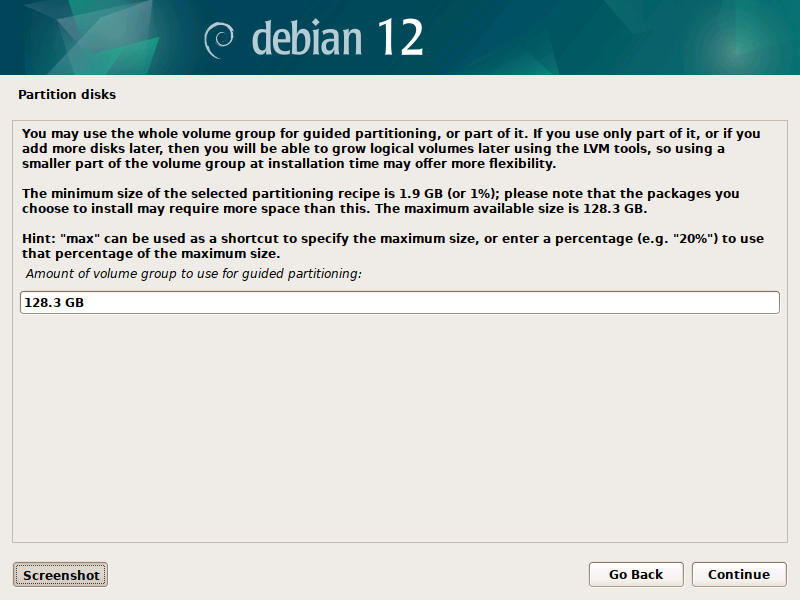
Step [16]If you selected LVM setup in pre-section, specify the size of Volume Group. (default is Max size of Disk).
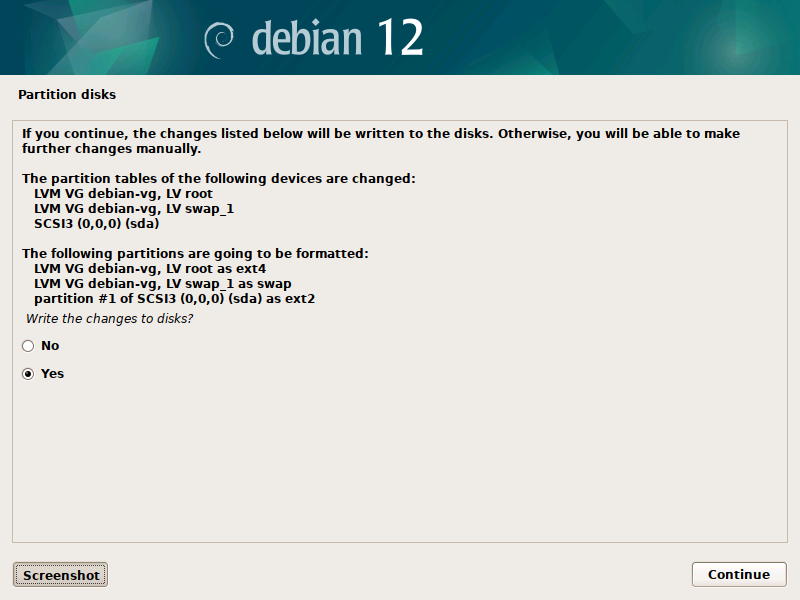
Step [17]It's the final confirmation for changing Disk. If that's OK, answer [Yes].
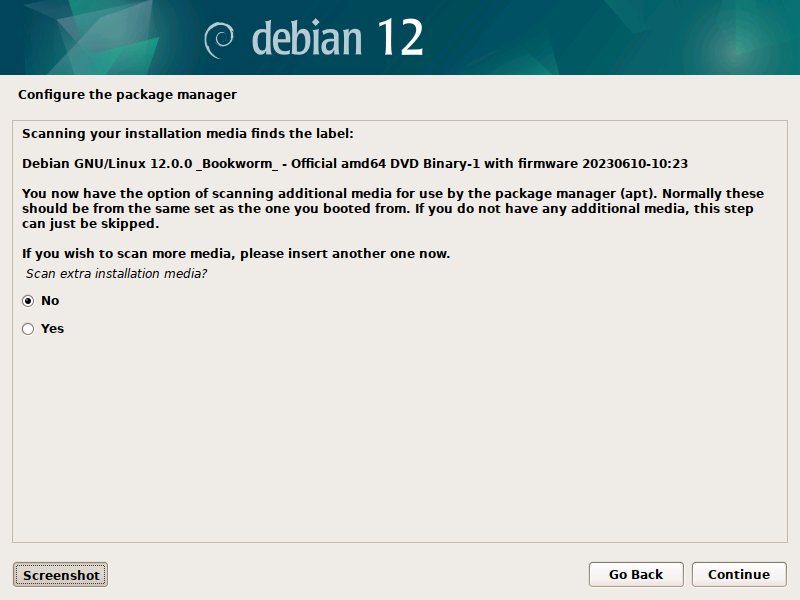
Step [18]After installing Base System, following screen is shown. If you'd like to install more packages from another CD/DVD, answer [Yes].
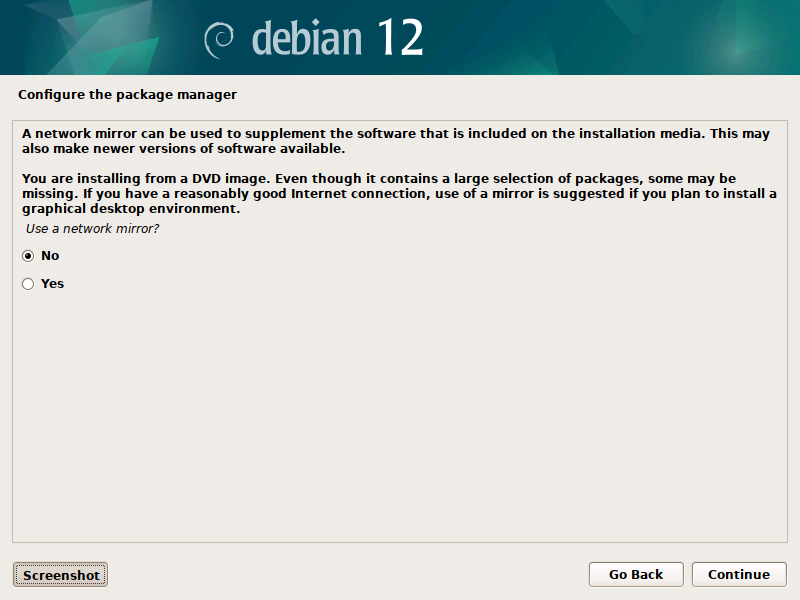
Step [19]If you'd like to set a network mirror site for Debian Repositories, answer [Yes].
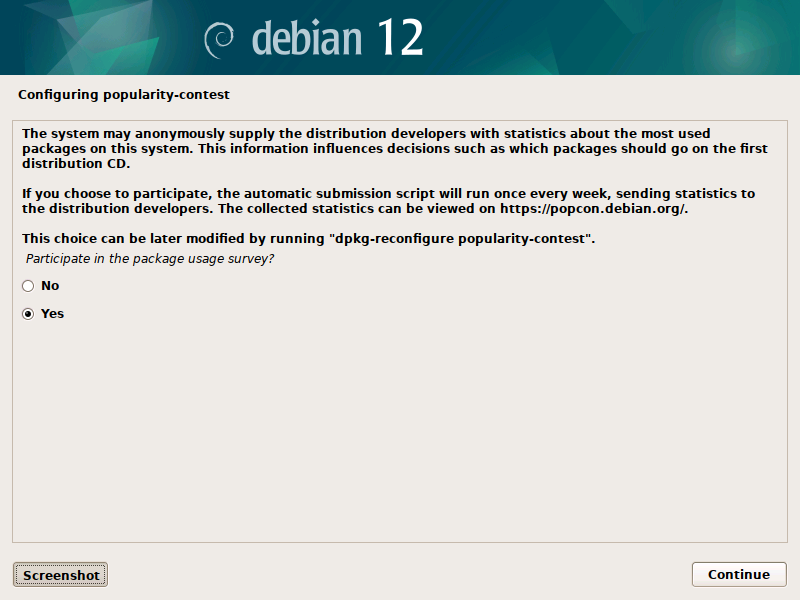
Step [20]Answer [Yes] to participate package usage survey as an anonymous.
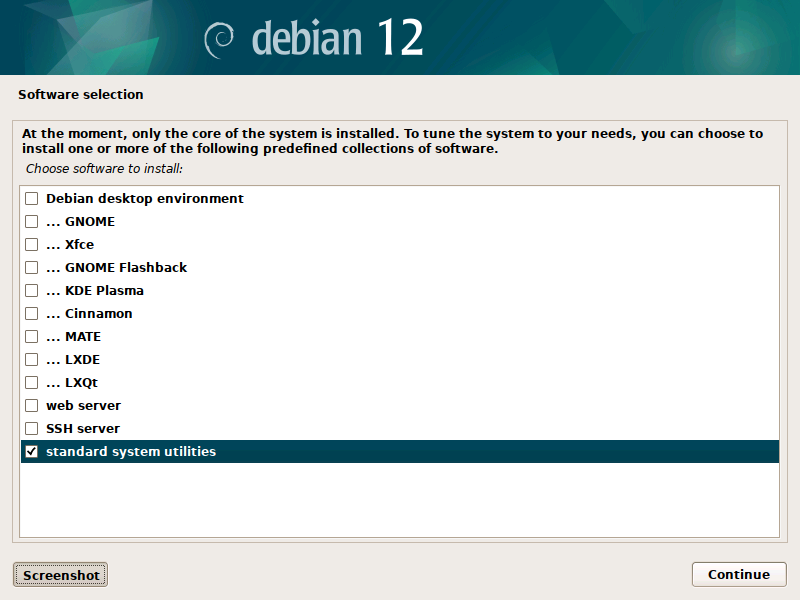
Step [21]Select software groups to install. On this example, it selects only [Standard system utilties] like follows.
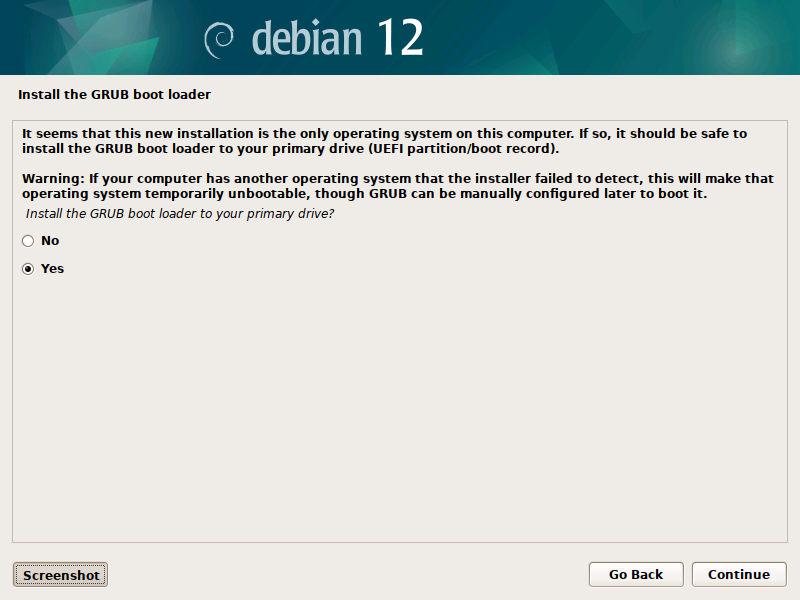
Step [22]GRUB Boot Loader is installed on local disk, if that's OK, select [Yes]. Generally it's OK with [Yes] on here unless your computer has been configured as the multiple OS boot setting.
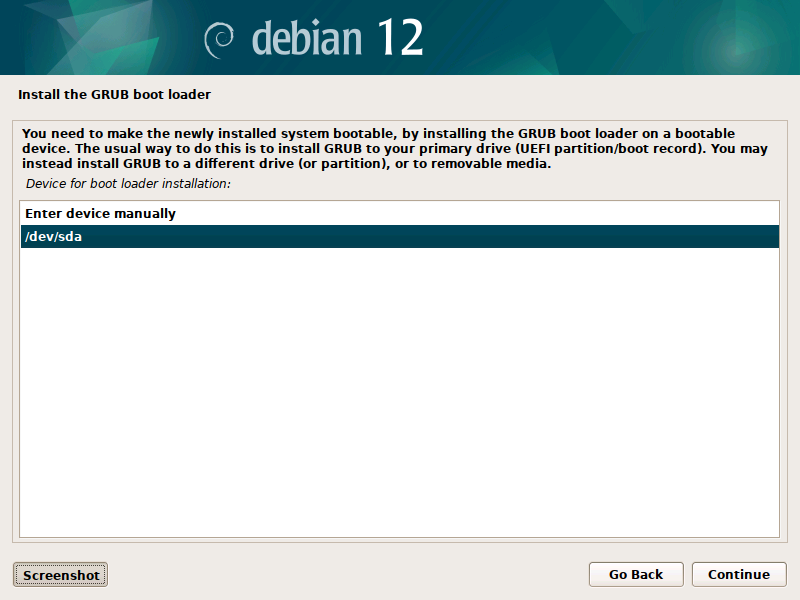
Step [23]Select a Disk to install GRUB bootloader.
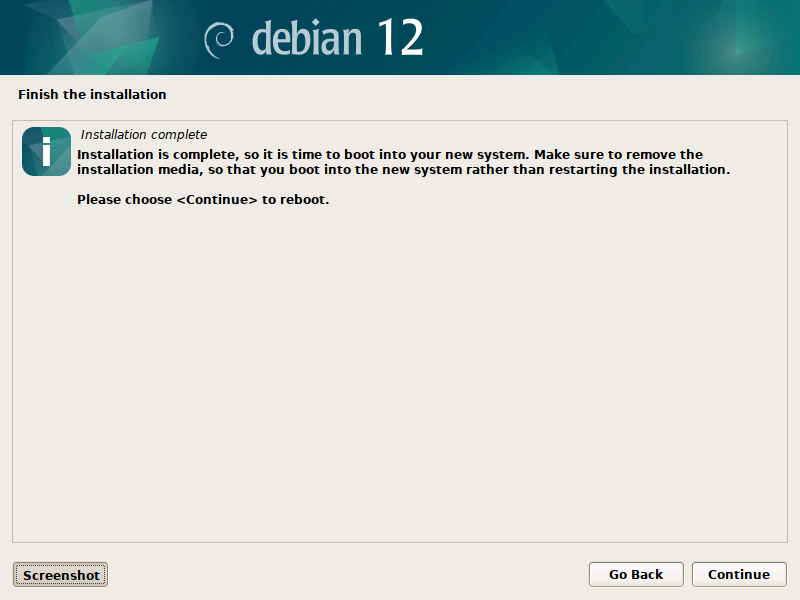
Step [24]Installation finished. Remove the DVD media and [Continue], then system will restart.
Step [25]After Debian Server has been restarted, login prompt is shown, Login as a user you set during the Installation, or root user account. If logined normally, Your Debian Server Installation has completed.
Debian GNU/Linux 12 debian ttyS0

debian login: debian
Password:
Linux debian 6.1.0-9-amd64 #1 SMP PREEMPT_DYNAMIC Debian 6.1.27-1 (2023-05-08) x86_64

The programs included with the Debian GNU/Linux system are free software;
the exact distribution terms for each program are described in the
individual files in /usr/share/doc/*/copyright.

Debian GNU/Linux comes with ABSOLUTELY NO WARRANTY, to the extent
permitted by applicable law.
debian@bizantum:~$


Comments
Post a Comment
Thank you for your comment! We appreciate your feedback, feel free to check out more of our articles.
Best regards, Bizantum Blog Team.